Autodeploying Angular Applications to AWS OpsWorks
Hosting on AWS OpsWorks
Amazon OpsWorks is an excellent, low-cost option for Platform-as-a-Service hosting. OpsWorks provides relatively easy-to-use UI mechanisms to manage, deploy and host applications on AWS EC2. Corgibytes uses OpsWorks to host both Rails-based and Angular-based servers for one of our clients. Configuring the Rails-based OpsWorks hosts was easy — mostly because there are tons of blog posts on how to do it. But setting up the Angular server was a bit more problematic for me, as my good friend, Google, provided little help.
Initially, we got the Angular app up quite easily on OpsWorks. But, we did it by manually configuring Nginx on the EC2 Linux box and using scp to copy the gulp-compiled version of the application from our Macs directly to a specific EC2 instance. As a rule, you should never manually configure OpsWorks applications. All of your OpsWorks-based applications should be completely rebuildable and deployable with a button click. You are able to pull that philosophy off by using OpsWorks Chef Cookbooks and Recipes and deployment hooks.
Let me show you how I built the AWS OpsWorks server, configured and customized Chef, configured GitHub retrieval of the application, and wrote a Ruby-based deployment hook to automate the configuration of Nginx and run gulp build to compile the Angular application.
Create a Stack
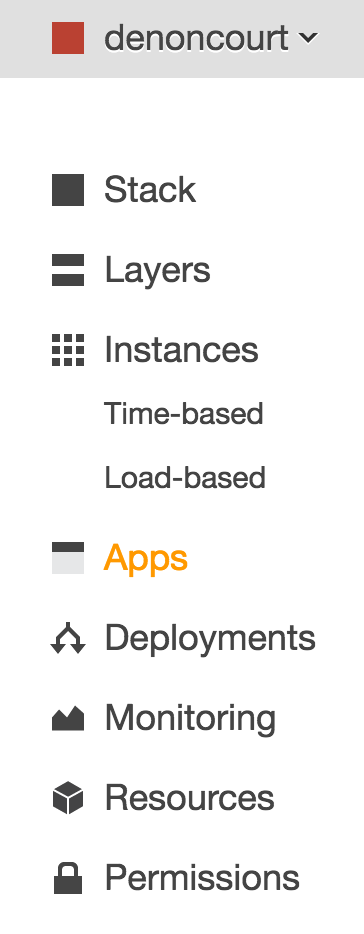
OpsWorks is set up with a stacked architecture known as: Stack, Layers, Instances, and Apps.
 {:height=“300px”}
- Stack: contains your configuration for things like the Linux operating system, SSH access, and the location for custom Chef cookbooks.
- Layers: configuration for your application deployment type (such as Rails, PHP, or Java) and the specification for what custom Chef recipes to run and when.
- Instances: are actual Linux machines that are either running on AWS EC2 or in a stopped state.
- Apps: is where you configure the Git or Subversion location of your application and any environment variables.
Deployments, Monitoring, Resources, and Permissions are not so much part of the stack as they are ways to monitor and configure the application.
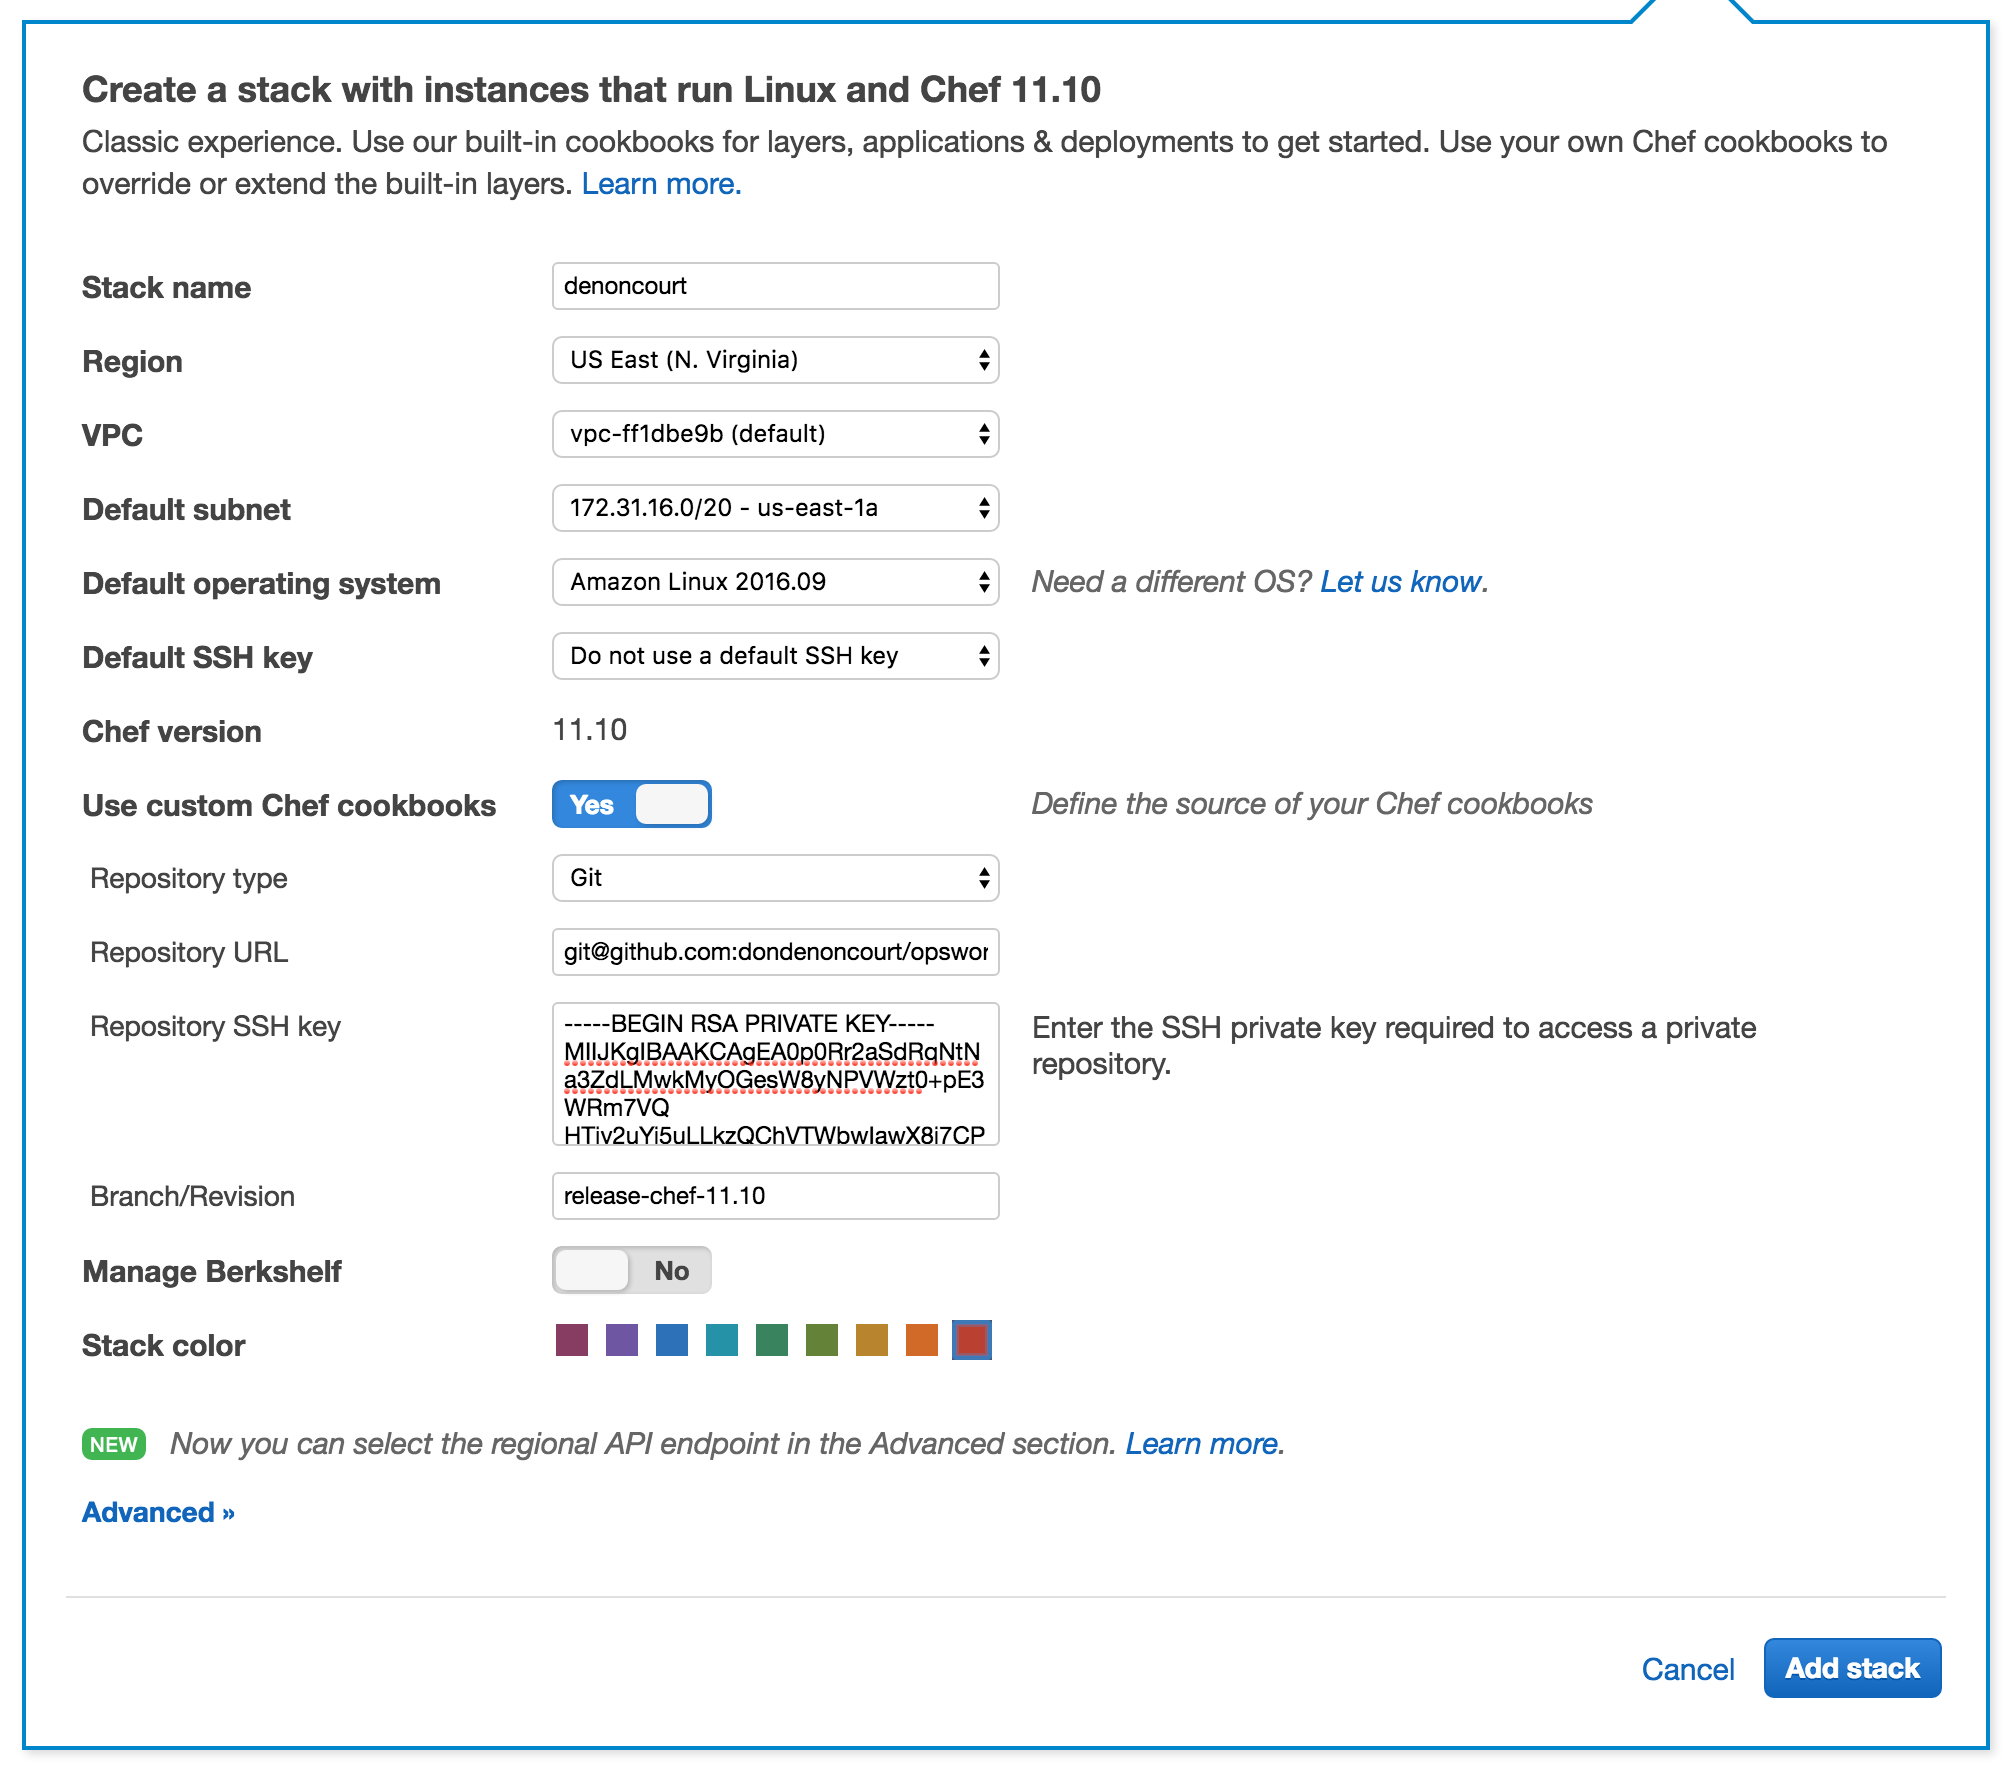
Now, we need to create a Stack. From OpsWorks Home, click the Add stack button. Give it a meaningful Stack name and accept the defaults for all but “Use custom Chef cookbooks”. For that option we need to select Yes, as we will be specifying some custom recipes.
Custom Cookbook
When you select Yes for cookbooks, the page will expand to show the options that are displayed in the image below. You will need to fork the AWS OpsWorks repository (Here’s help on how to do GitHub forks).
Note: You might want to set up SSH keys so you can access your Linux instances from a local Bash session. This GitHub help guide will walk you through that process. After you have forked opsworks-cookbooks, update the following on the Add Stack page:
- Repository Type: Select Git from the drop-down.
- Repository URL:
git@github.com:<yourgithubaccountname>/opsworks-cookbooks.git - Repository SSH: Paste in a key that you have configured in GitHub’s settings and keys page.
- Repository Branch: Key:
release-chef-11.10
And, finally, click Add stack.
Add a Layer
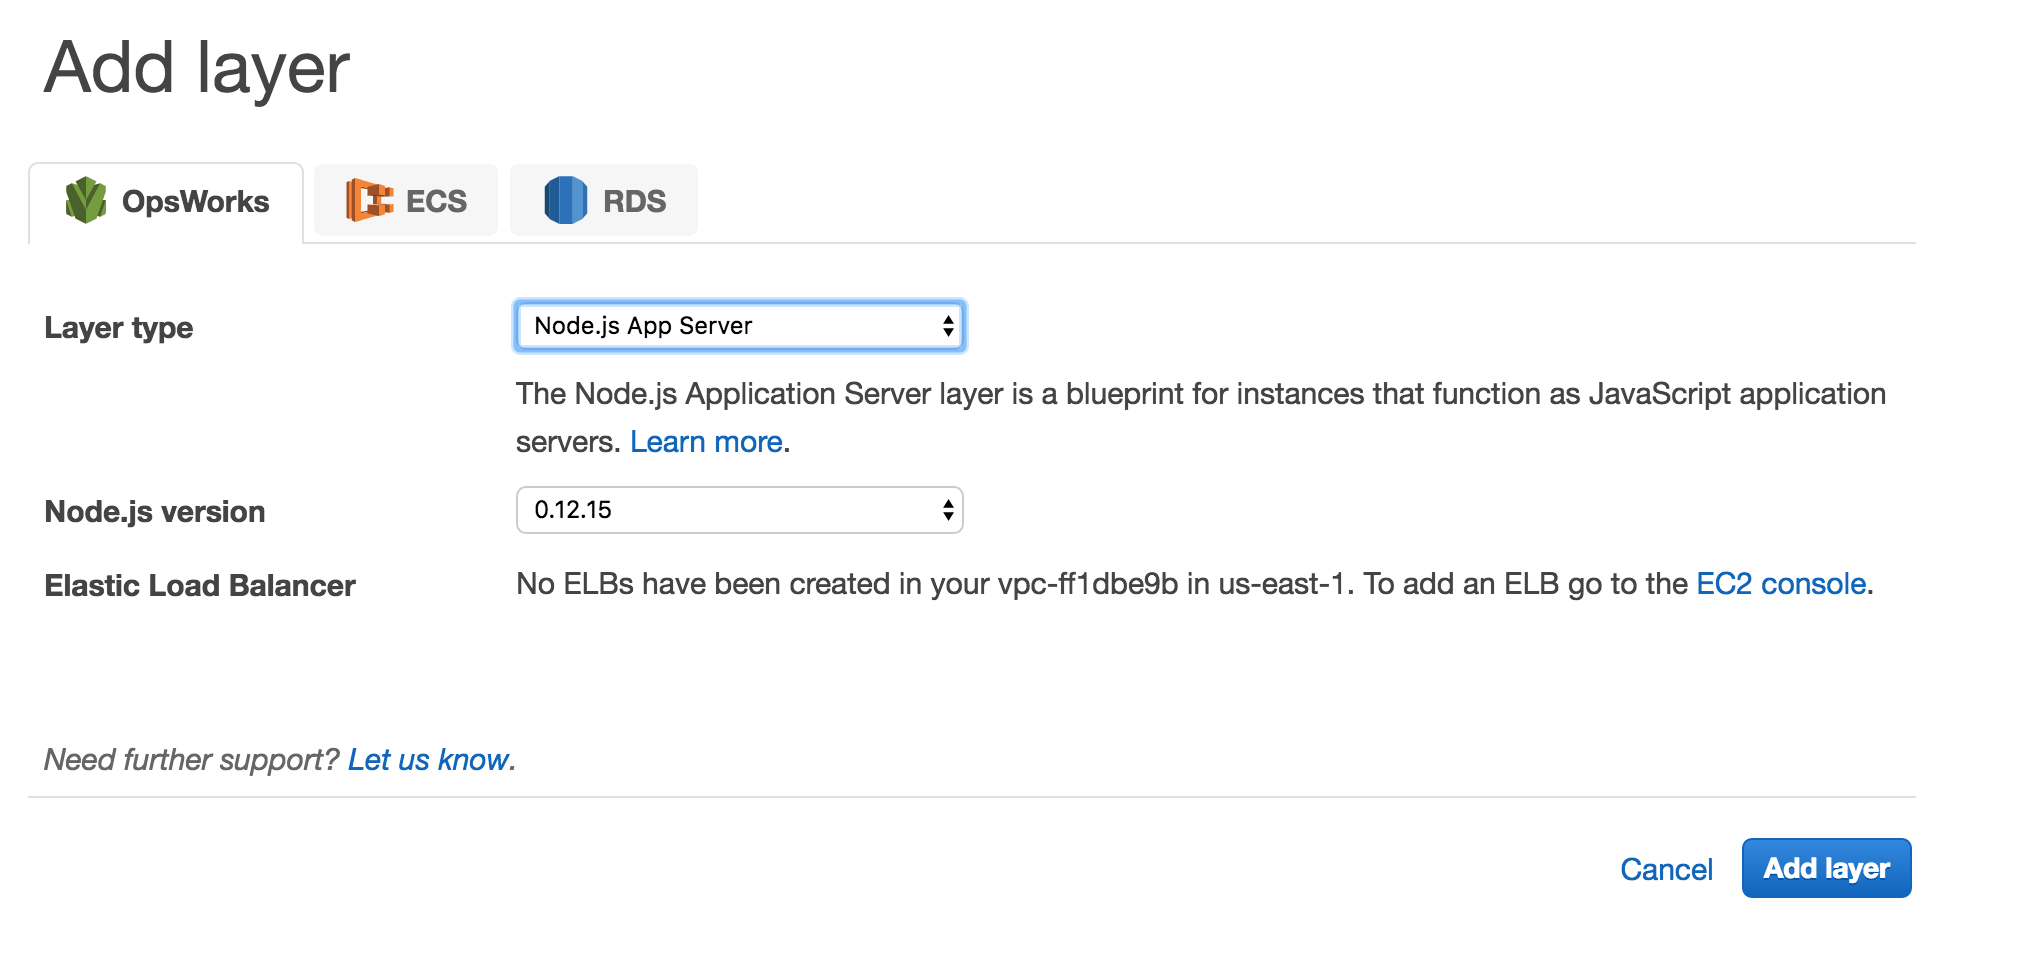
With the Stack build, we next need to create a layer:
- Click
Layersand thenAdd layer. - Select
Node.js App Serverfrom the drop-down. - Click the
Add layerbutton.
Our application is not directly using Node.js, but I found the OpsWorks Node.js layer type to be configured in a way that made adding an Angular application relatively easy.
If you haven’t already done so, click Add layer to create the layer.
Add Custom Recipes
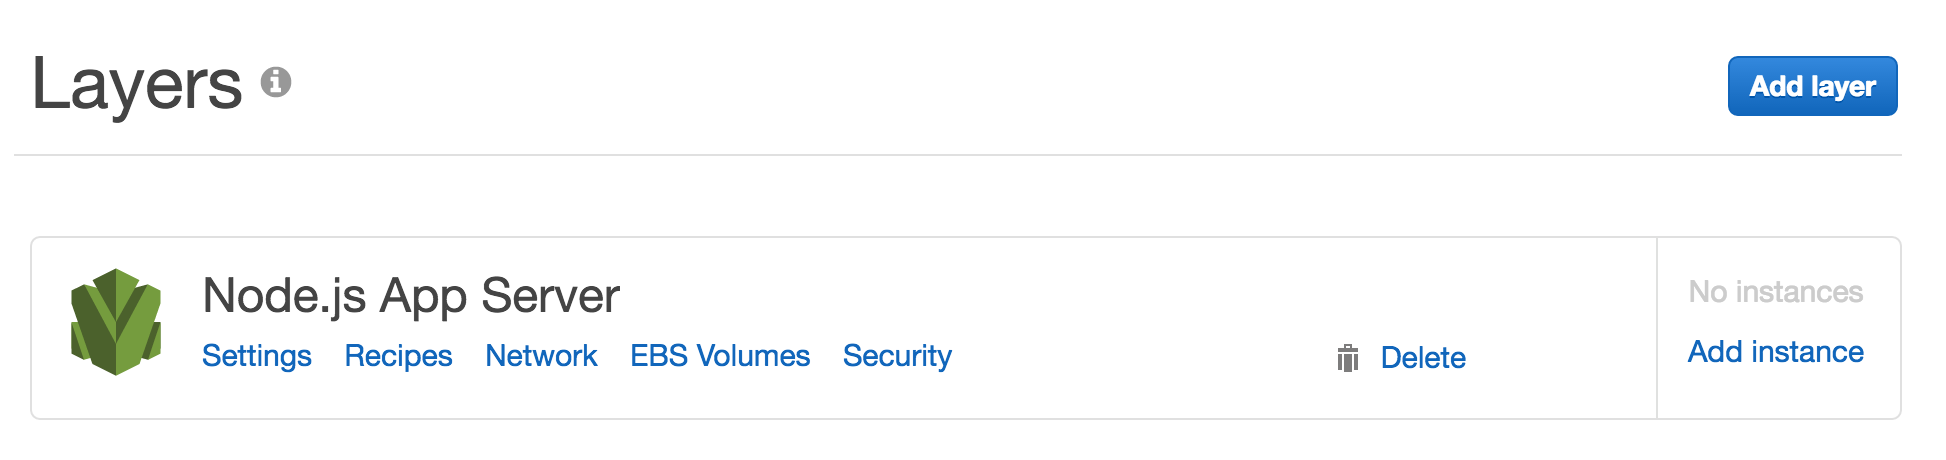
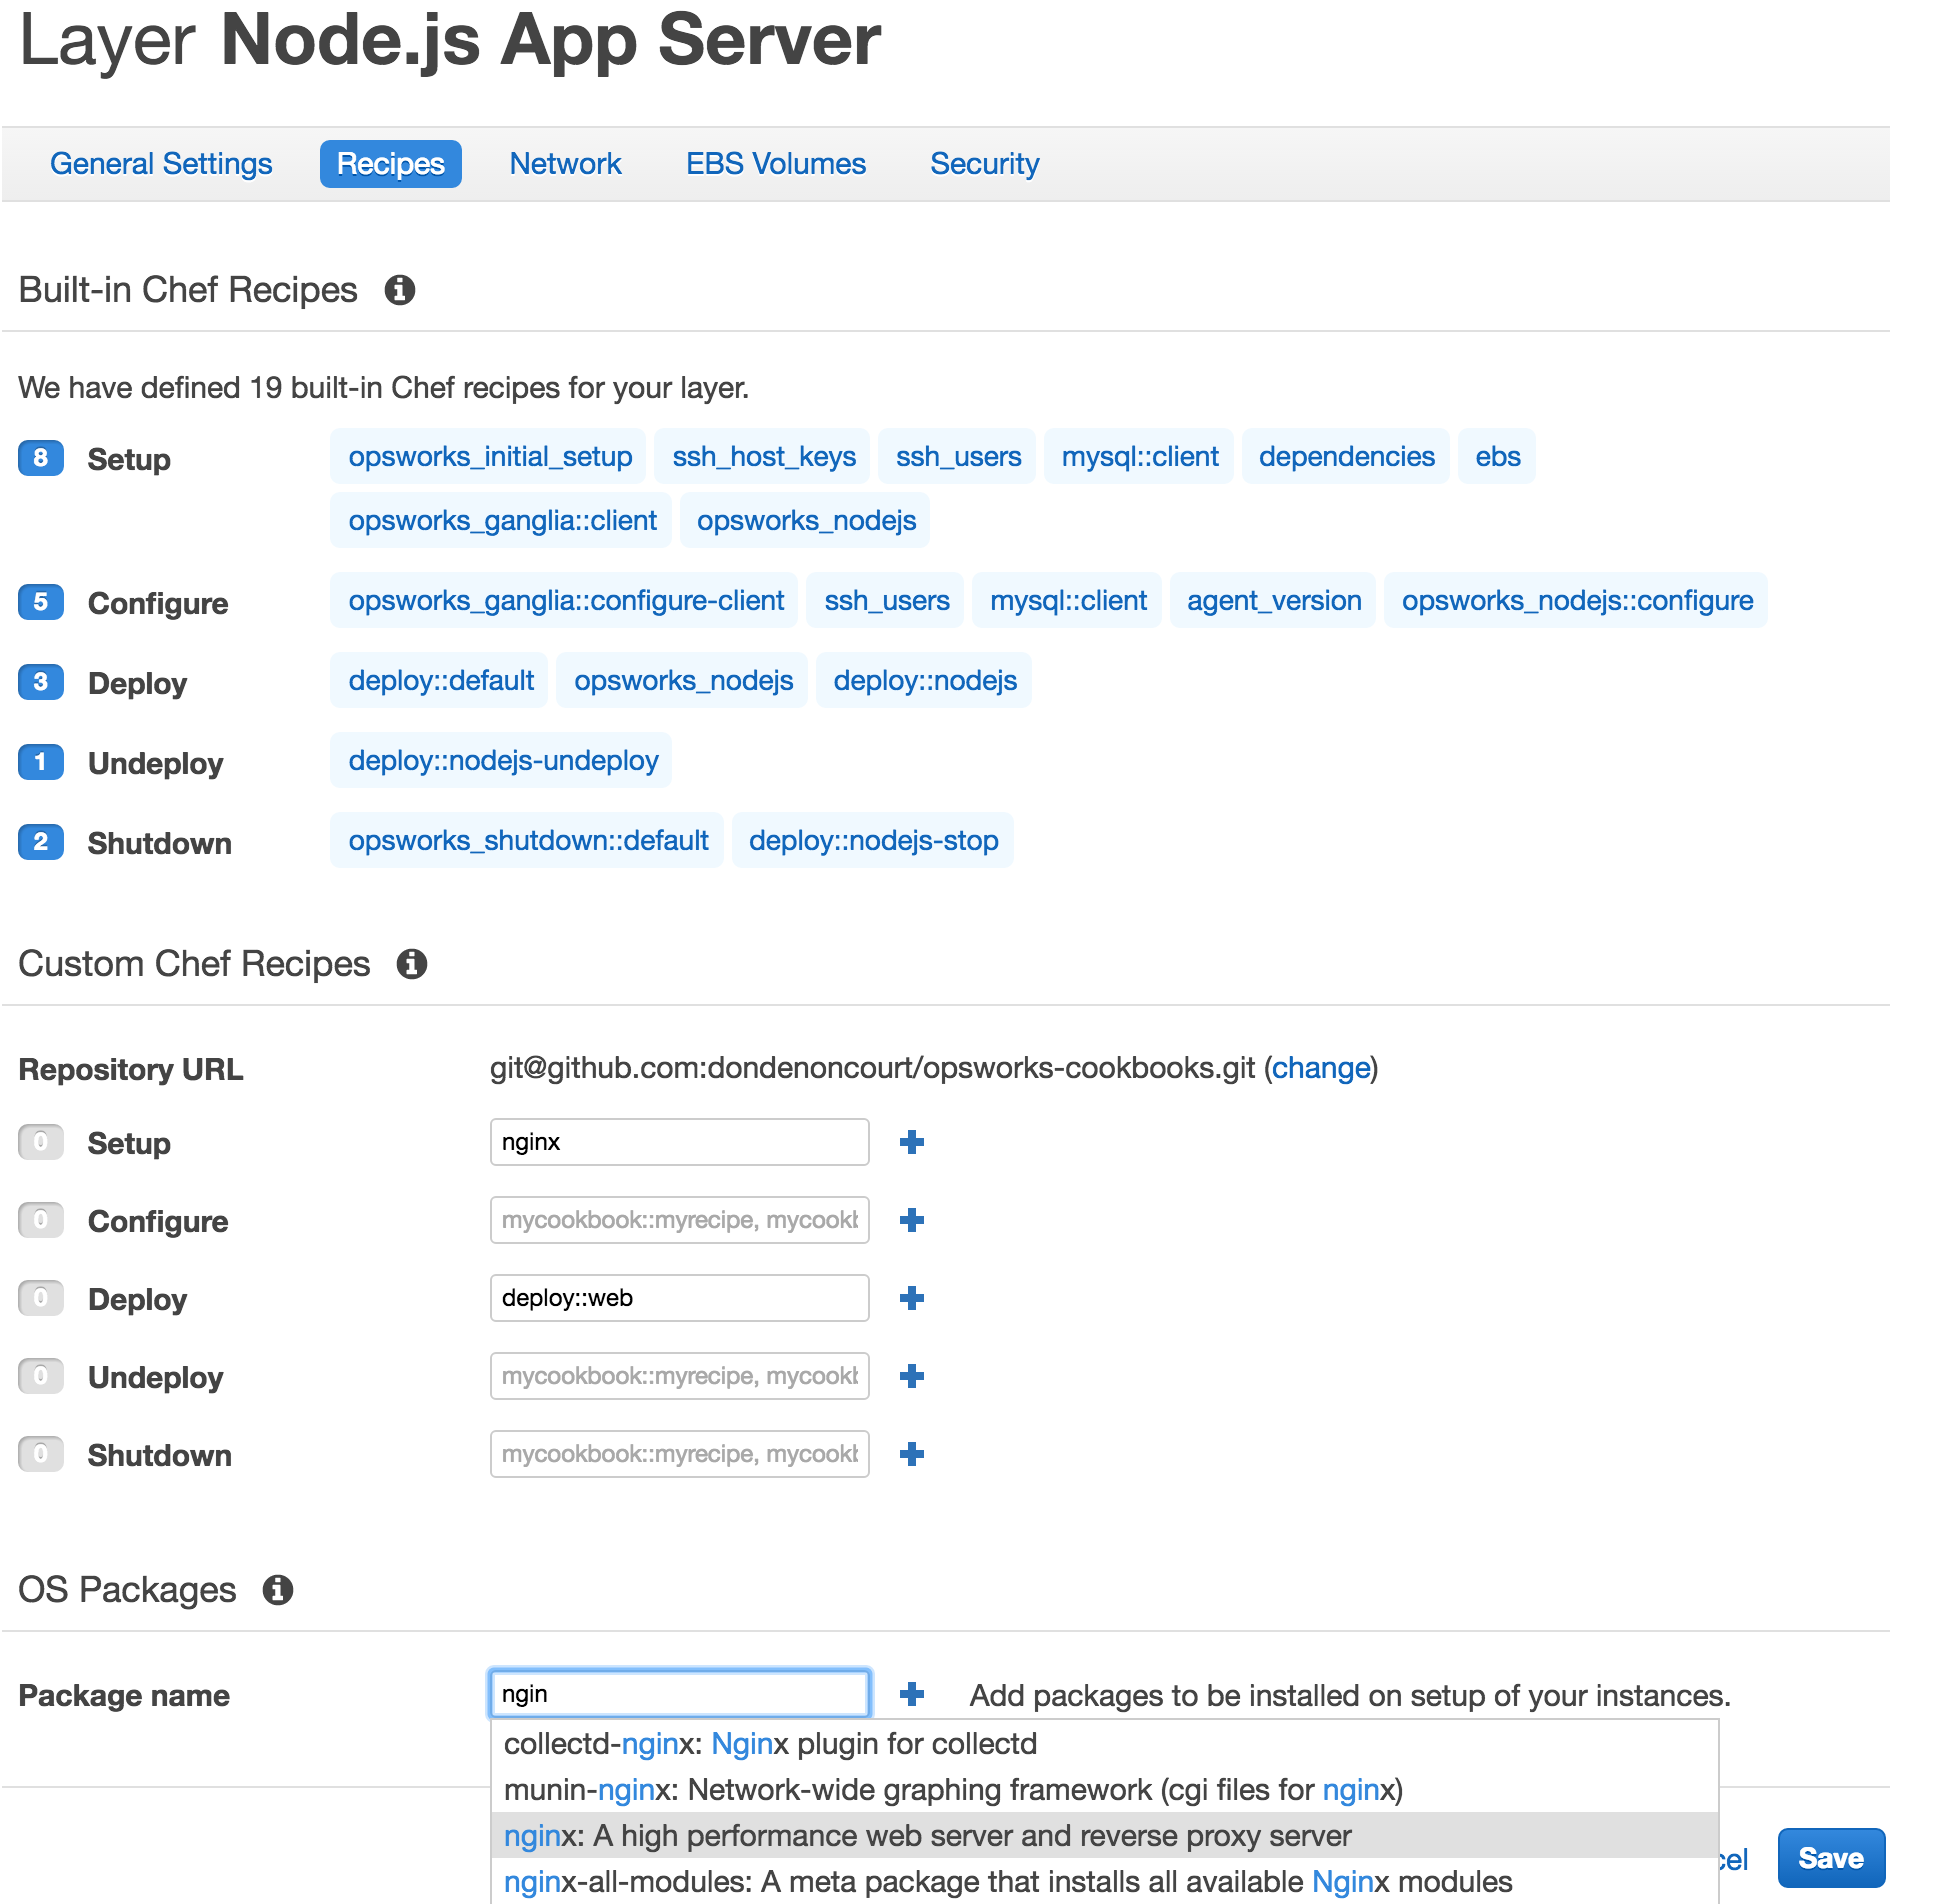
With the layer built, we need to next customize it with recipes. Click the Recipes link on the Layers page.
Then, on the page shown below, we need to add two custom recipes and the Nginx OS package. Put key nginx in Setup and deploy::web in the Deploy prompt. Then, we need to add the Nginx package. The Node.js layer will not, by default, install Nginx. We can easily add it by keying the “ngin” into the “Package name” prompt and then selecting nginx from the auto-complete drop-down. Note that, if a Linux package is available for the Linux operating system specified for your Layer, it will show up in a drop-down. If the package is not found, you will have to configure the installation in a cookbook recipe or manually add it in a Bash session after the Linux instance is started (note, manually adding packages in an instance is not recommended).
Finally, click the Save button.
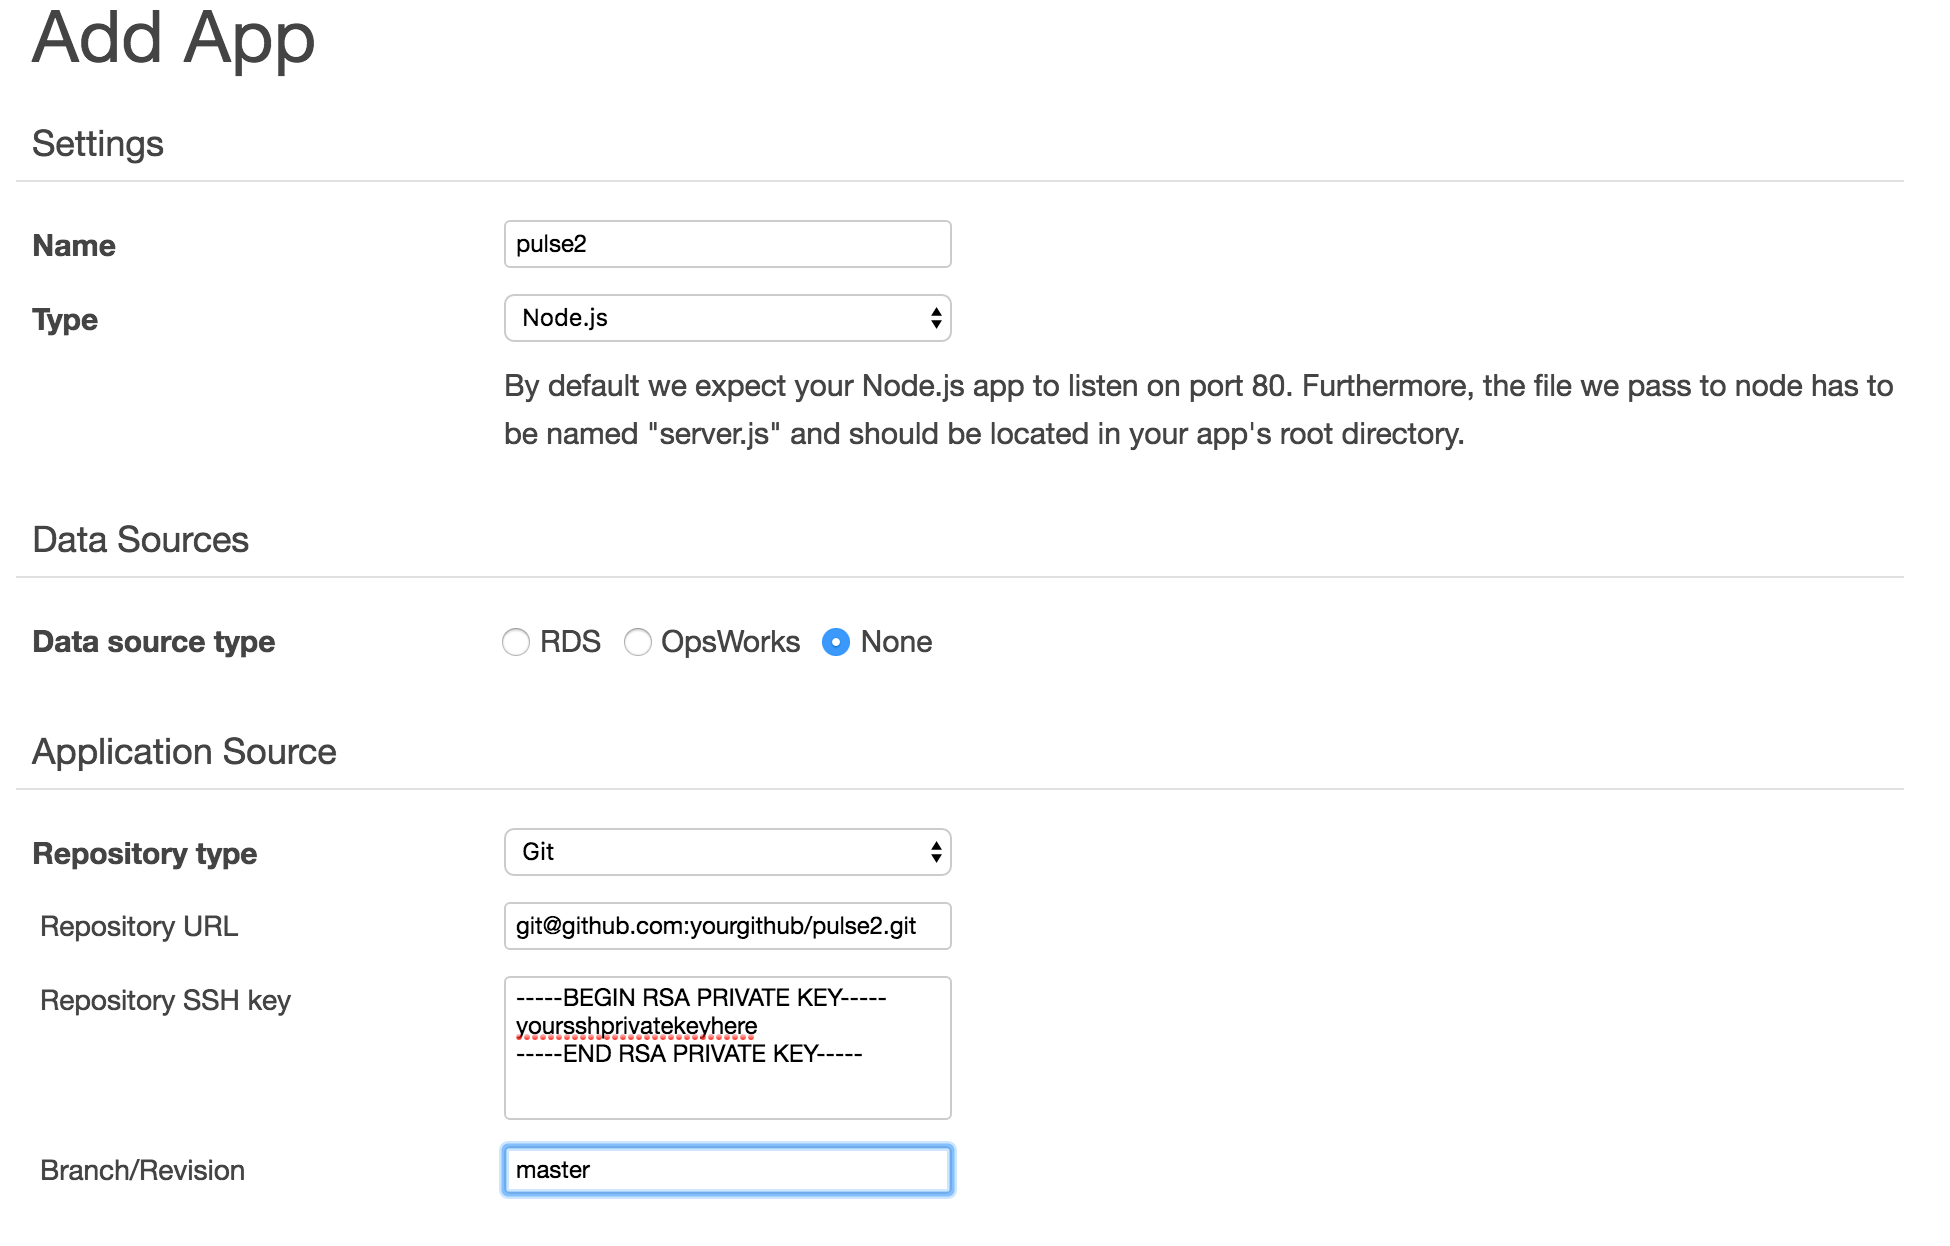
Add the Application
Before we add a Linux instance to our Stack, we need to first specify the application. Enter your application’s GitHub location, the repository SSH key, and the branch.
Add an AWS OpsWorks Chef Deployment Hook
We’re almost ready to add a Linux instance and launch the site. But first, we need to add a Ruby-based callback. Create a directory in your Angular application root called deploy and add a file called after_restart.rb. The full 50 lines of Ruby code is shown below and it is broken down into six steps:
- npm install
- build dist with gulp
- ensure config directory exists
- set the config file
- copy gulp generated dist directory to nginx
- restart nginx
Step 1 asks the Node Package Manager to install all the packages listing in package.json. One of those packages is gulp — which we need to build/compile the Angular application.
Step 2 runs gulp build.
With the app built, Step 3 makes sure that the configuration directory exists by running the mkdir with the -p option so it won’t error out if the directory already exists.
Step 4 copies in an Nginx configuration file that specifies the location of the application.
Step 5 then copies the gulp-compiled distribution directory to the appropriate Nginx location.
And, finally, Step 6 restarts Nginx.
Note that “pulse2” is the name of my application’s Git repository, so then the name of the Nginx-enabled site is /etc/nginx/sites-enabled/pulse2. And “pulse” is the name that I gave when I created the OpsWorks App entry, so that name is then used by OpsWorks to create a directory called /srv/www/pulse, and that’s where the gulp binary — that Node Package Manager installed — exists: /srv/www/pulse/current/node_modules/.bin/gulp. It may have been easier to not have confused things with the pulse2 name, but it’s good to know that the name of the /srv/www/pulse directory comes from the OpsWorks application you created, and the pulse2 directories were named to match the Git repository name.
# deploy/after_restart.rb
Chef::Log.info("Pulse on OpsWorks running after deployment")

execute "npm install" do
  cwd release_path
  user "deploy"
  environment "NODE_ENV" => 'production'
  command "npm install"
end

execute "build dist with gulp" do
  cwd release_path
  user "deploy"
  environment "NODE_ENV" => 'production'
  command "/srv/www/pulse/current/node_modules/.bin/gulp build"
end

execute "ensure config directory exists" do
  cwd release_path
  user "root"
  command "mkdir -p /var/www/pulse2"
end

execute "set the config file" do
  cwd release_path
  user "root"

  enable_site = <<-enable_site
server {
  listen   80 default_server;
  server_name  127.0.0.1;
  access_log  /var/log/nginx/localhost.access.log;
  location / {
    root   /var/www/pulse2;
    index  index.html index.htm;
  }
}
  enable_site

  command "echo '#{enable_site}' > /etc/nginx/sites-enabled/pulse2"
end

execute "copy gulp generated dist directory to nginx" do
  cwd release_path
  user "root"
  command "cp -Rf /srv/www/pulse/current/dist/* /var/www/pulse2"
end

execute "restart nginx" do
  cwd release_path
  command "/etc/init.d/nginx restart"
end
Add and Start an Instance
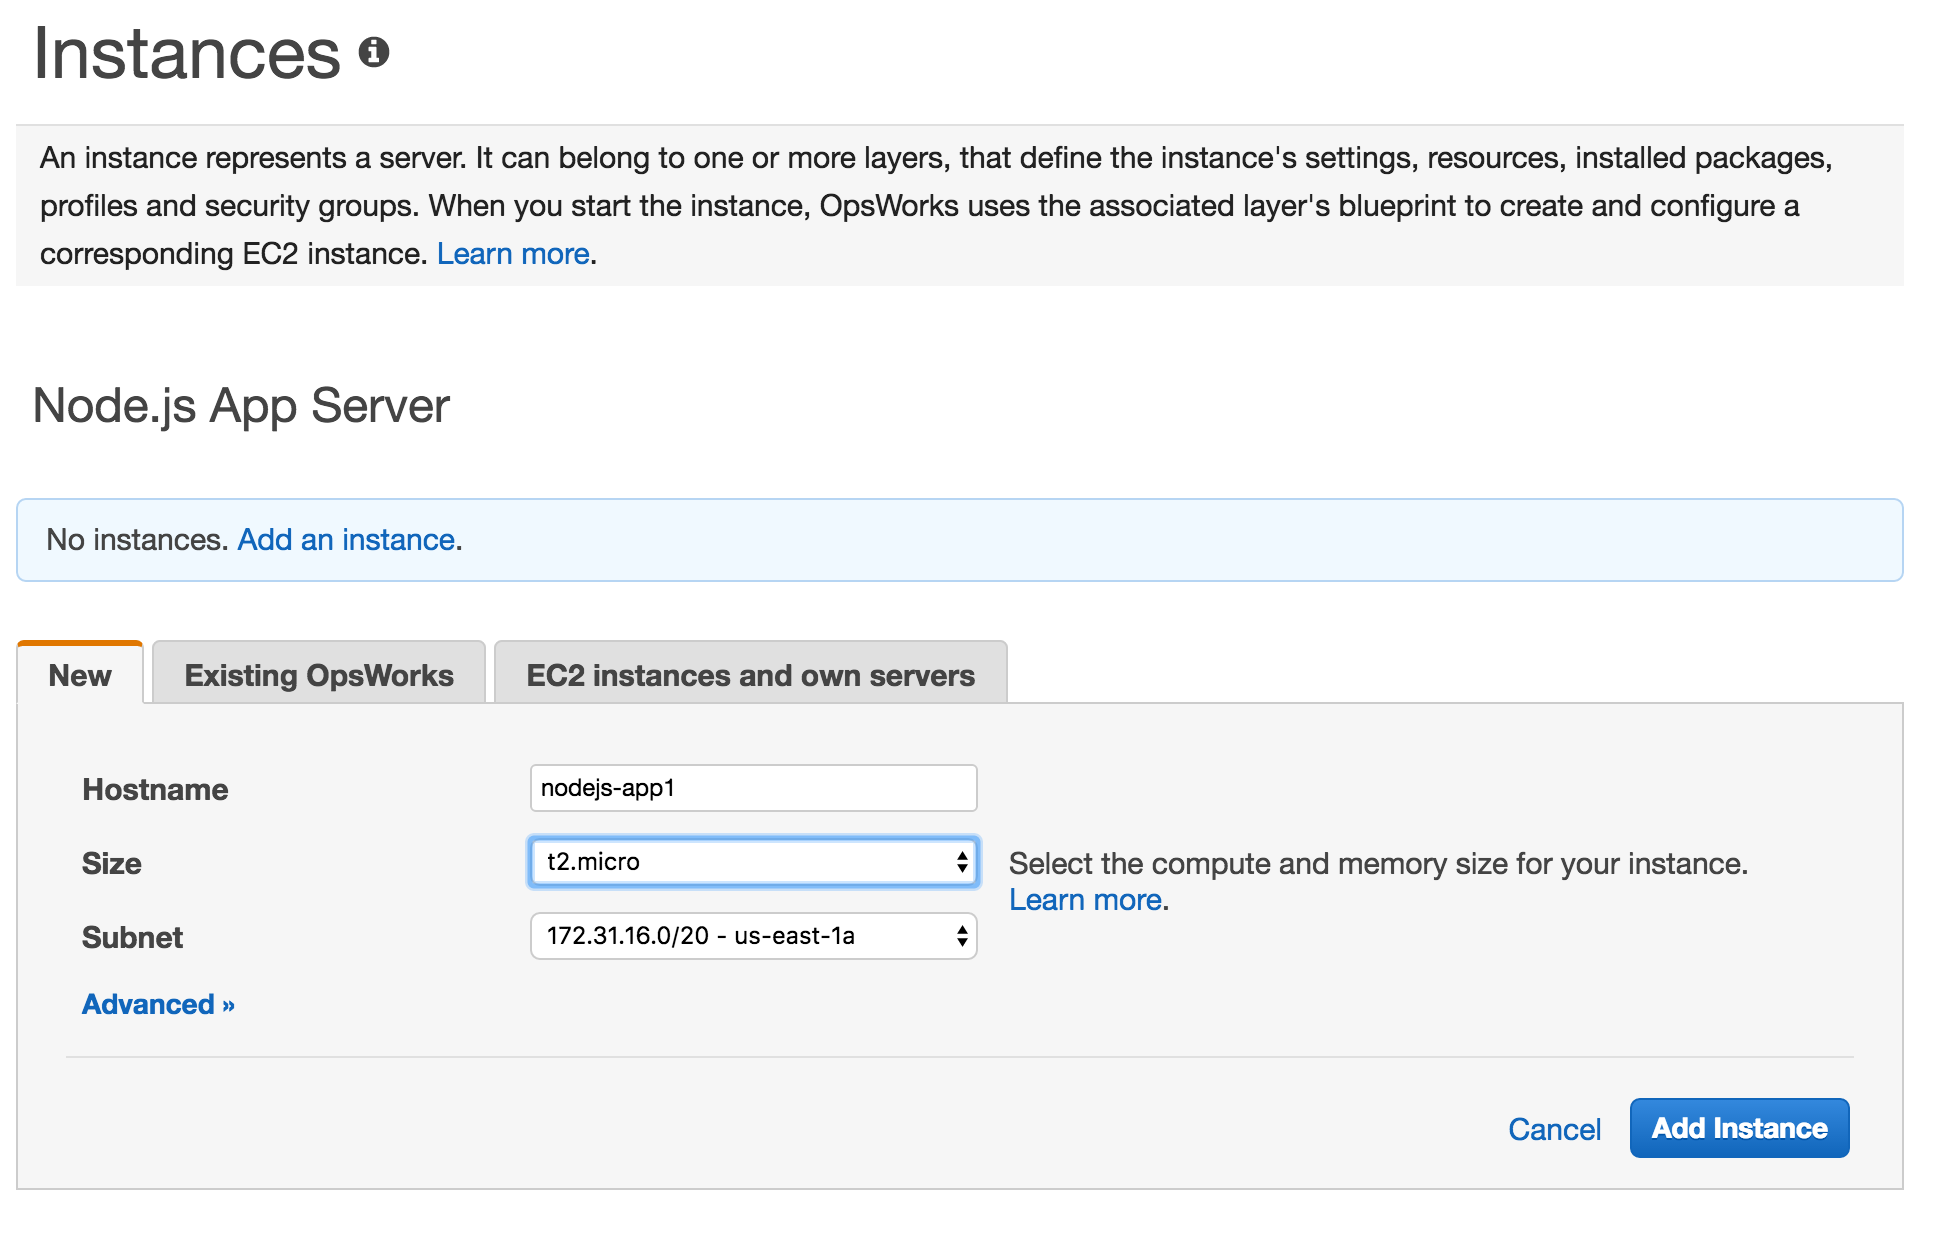
Now, with the Application configured and a callback added, let’s add a Linux machine by clicking on the Add Instance link. Warning: On Add Instance, be sure to change Size as it defaults to c3.large. As they say: “That’s how they get you!” OpsWorks uses EC2 instances and OpsWorks is very inexpensive — if you select small EC2 instances.
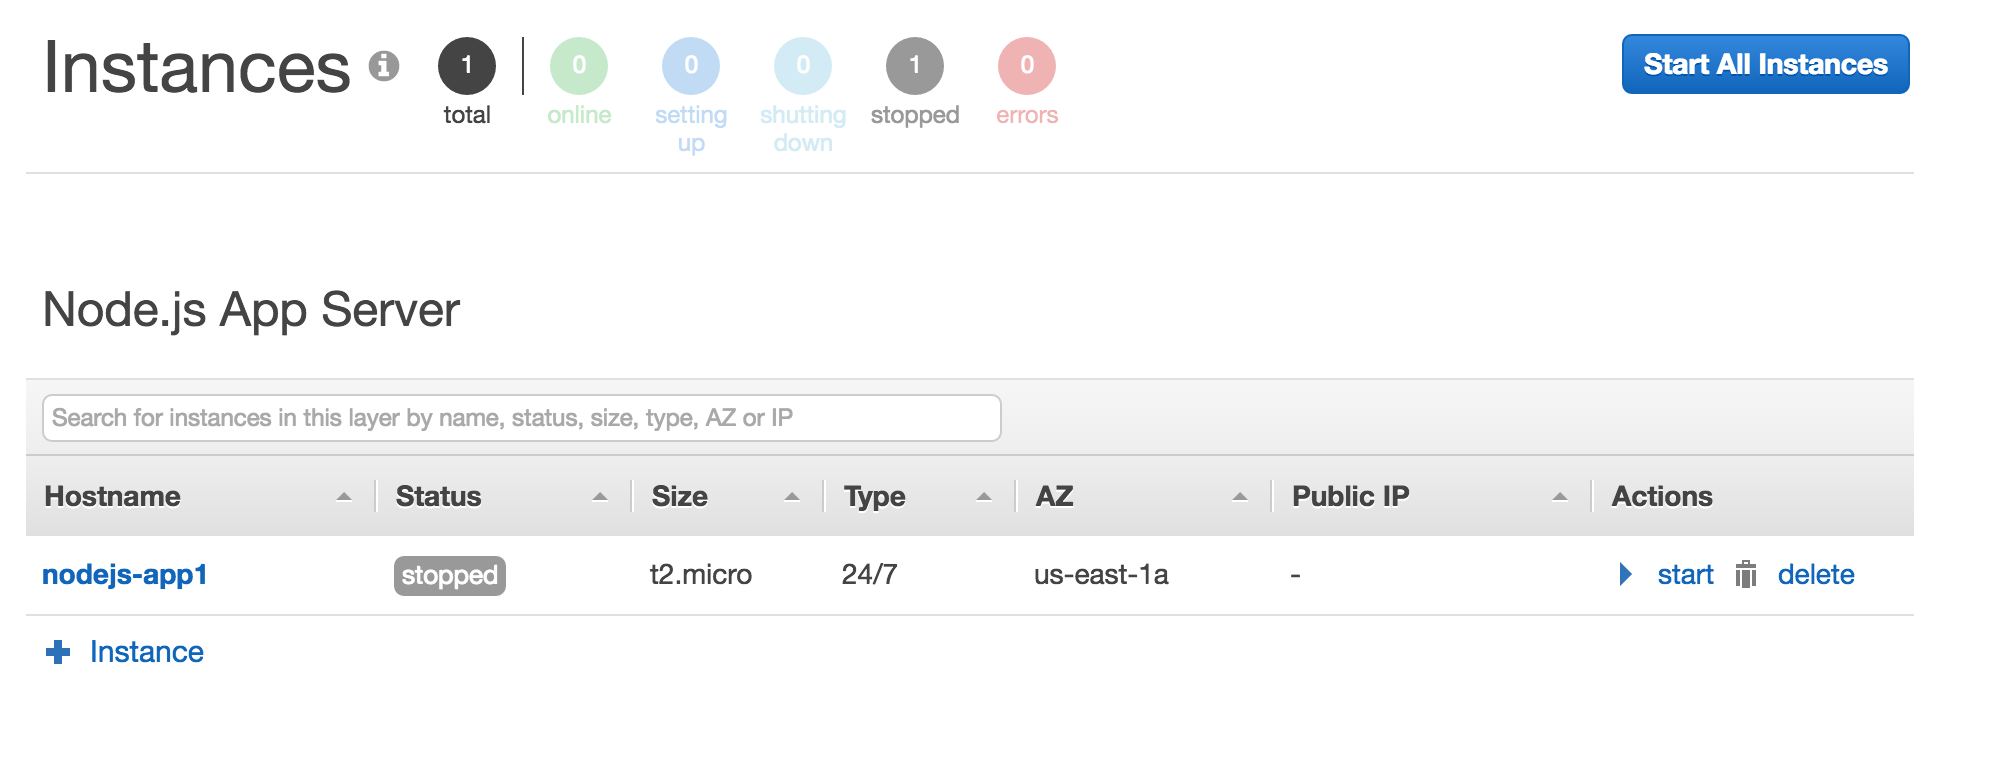
Now start the instance by clicking the start link. It takes maybe 5-8 minutes as it builds the Linux machine, runs the recipes associated in the Layer, and then retrieves the application from Git. If it fails, click on the failure log link on the Apps page.
Deploy or Rebuild with a Button Click
Now, we can launch a new instance or deploy our latest changes with a button click. Also, we can easily create a new instance and change the GitHub branch to test a branch on a non-production server. This strategy is working well for us, but if you know of a better mechanism, please let us and our blog readers know.
Want to be alerted when we publish future blogs? Sign up for our newsletter!